Last updated: September 10, 2026
Key Takeaways
- Dig around the base to expose at least 8 to 12 inches of the post.
- Use two temporary 2×4 braces at 90 degrees to each other.
- Put 4 to 6 inches of crushed gravel or angular stone at the bottom before backfilling.
- The basic job often takes 2 to 4 hours for one post, plus manufacturer cure time if you use concrete or hydraulic mix; for uncertain soil conditions, consult a fence contractor or local building professional.
A fence post that wiggles is usually telling you something plain: the base moved, the footing gave out, or the connection loosened. So if you are looking for how to fix loose fence post soil or concrete, the repair depends on whether the trouble sits in soft ground, cracked concrete, or the hardware itself. No mystery. The point is to bring back a solid load path without burying a bigger defect.
What kind of loose post are you dealing with?
This fix applies when the post itself is still sound but the base moves about 1/4 inch or more at the top, the fence leans after wind, or the post spins a little when you push it. I’m assuming you already know the fence type, can tell wood from steel or vinyl, and can dig or remove a few inches of soil if needed. I’m also assuming this is a normal residential fence, not a retaining wall, pool barrier, or anything tied to structural safety codes.
A rotten post changes the whole picture. If the post is rotted at ground level, bent, split, or crushed, tightening the footing will not save it. A fence post is a load path: wind load travels from the rails to the post to the footing to the soil. And if the wood is soft or the metal tube is rusted through near grade, that path has already failed.
The three common cases are:
- Loose in soil: the hole is oversized, backfill has settled, or water has softened the base.
- Loose in concrete: the concrete pier is cracked, heaved, or the post anchor has failed.
- Loose because of hardware: brackets, bolts, or screws at the rail connection are sloppy, which can feel like a post problem even when the footing is fine.
A small repair can work when the post is basically plumb and the base is intact. But it is the wrong move if the post leans more than a few degrees, if several posts are moving, or if the fence line sits in wet clay, frost-heave country, or a windy corner where the original footing was undersized. In those spots, a patch often buys a season and then quits. Like taping over a cracked mug.
How do you fix a loose fence post in soil?
You fix a loose fence post in soil by stabilizing the base, restoring drainage, and packing the post in a way that resists future movement. For how to fix loose fence post soil or concrete, the soil version often takes 2 to 4 hours for one post, plus cure time if you use concrete or a hydraulic mix, and the exact timing depends on the product label and site conditions. For a wood post set in soil, I would choose to re-set it only if the post is sound and the hole can be reworked to at least 2 to 3 times the post width in diameter.
Before anything else, disconnect the load. Remove one or two fence panels or loosen the rails if you can. A post under tension from attached panels is harder to plumb and more likely to move while you work.
-
Check the post and mark the lean. Use a 4-foot level or a plumb line and mark the direction of movement. Verify whether the post shifts at the base or flexes higher up. If the wood is punky, split, or cracked near grade, the problem is the post, not just the hole.
-
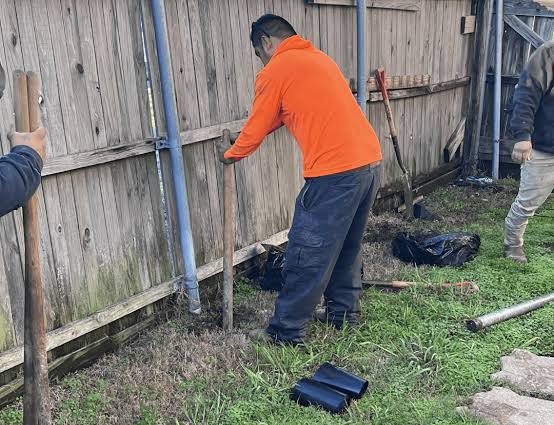
Dig around the base to expose at least 8 to 12 inches of the post. Clear out soil, mulch, and roots on all sides. Verify that you can see where the original backfill ends. If water fills the hole or the soil slumps immediately, drainage is part of the failure.
-
Remove loose backfill and undercut the sides slightly. Make the hole wider near the bottom if possible, not just the top. A common target is a hole about 3 times the post width for wood posts. Verify the post can be moved enough to center it. If the hole collapses or becomes too large to control, the original footing was too weak for a simple reset.
-
Set the post plumb and brace it. Use two temporary 2×4 braces at 90 degrees to each other. Check plumb on two faces. If the post drifts while you adjust, the base is still too loose or the brace is not rigid enough.
-
Add a drainage layer if the soil stays wet. Put 4 to 6 inches of crushed gravel or angular stone at the bottom before backfilling. Verify the post base is not sitting in a mud pocket. If your hole already reaches standing water, backfill alone will not solve the problem.
-
Backfill in lifts and compact each lift. Add soil or gravel in 4-inch layers and tamp each layer with a hand tamper or a blunt 2×4. Verify the post does not move after each lift. If it shifts, stop and reset before adding more material.
-
Use the right setting material for the soil. In drier, well-drained ground, compacted crushed stone can work well around the lower section of the post. In many residential repairs, a rapid-setting concrete or post-setting mix is used for the bottom portion, with the top few inches finished with soil to shed water. Verify the mix is firming up around the post without pulling it off plumb. If the post moves during cure, consult the manufacturer directions or a professional before hanging load back on it.
-
Reconnect the fence after initial set. If you used a fast-setting mix, wait for the manufacturer’s set time before hanging load back on it; many products grip in about 20 to 40 minutes, but full cure takes much longer. Verify the post stays plumb after you remove the braces. If it springs back or leans, the hole is not controlling the load.
I do not like burying the post deeper as a reflex. If the post already decayed at grade, deeper burial can hide the damage and trap moisture. That is especially true for untreated wood and for sites with poor drainage, so a professional opinion is wise if the base looks compromised.
How do you fix a loose fence post in concrete?

You fix a loose fence post in concrete by deciding whether the post anchor is loose, the concrete is cracked, or the whole footing has failed. For how to fix loose fence post soil or concrete, the concrete version usually takes 1 hour for hardware tightening and half a day or more if the footing has to be broken out and rebuilt. A concrete set post that wiggles usually means the pier has separated from the surrounding soil, the concrete has fractured, or the metal anchor bolts have loosened.
Concrete is not a cure for every loose post. It works best when the post is in a sound footing and the problem is at the connection. It is the wrong fix if the concrete itself has heaved, tilted, or broken away from the surrounding ground.
Here is the sequence I would follow:
-
Inspect the connection first. On metal posts or posts in brackets, check for loose bolts, corroded fasteners, or cracked welds. A loose 1/2-inch lag or through-bolt can mimic a footing failure. Verify whether tightening changes the movement. If it does, the footing may be fine.
-
Probe the concrete edge. Look for cracks wider than a hairline, hollow sounds when tapped, exposed rebar, or a gap between concrete and soil. Verify whether the post moves inside the concrete or the whole pier shifts. If the entire pier rocks, the problem is below grade.
-
Decide whether to patch or replace. Small surface cracks can sometimes be sealed, but a cracked footing that moves under hand pressure usually needs removal and replacement. I would not trust a patch if the post supports a gate. Gate posts see torsion, not just side load, and they fail sooner.
-
Expose the footing. Dig around the pier far enough to see the sides and base, usually 6 to 12 inches below grade. Verify whether water has pooled around it or soil has eroded away. If the pier is undersized or bell-shaped at the wrong depth, the original installation was the real problem.
-
If the post is anchored in a bracket, replace the hardware. Use corrosion-resistant hardware sized to the post and bracket, often 3/8-inch or 1/2-inch galvanized or stainless fasteners depending on the assembly. Verify all holes are snug and the bracket sits flat. If holes are wallowed out, the bracket has lost holding power.
-
If the footing is broken, remove and redo it. Break out the failed concrete, clear the hole, and reset the post in a new footing with enough depth for your climate and soil. In colder regions, footing depth needs to be below local frost line; that number varies by jurisdiction, so I would check the local building department rather than guess. Verify the new hole is straight, deep enough, and drained before pouring.
-
Plumb the post during reset and leave it braced. Use a level on two sides and brace before the concrete takes load. Verify the post does not twist while curing. If you are using ready-mix or fast-setting concrete, the top may stiffen quickly, but the footing still needs time to gain strength.
A concrete repair can look tidy when it is done right. It looks sloppy when someone smears patch around the outside, because the post still works against a cracked core. Surface patching is cosmetic if the footing is moving.
What does a bad repair look like?
A bad repair looks stable for a week and then starts to lean, crack, or swallow the post again after rain or wind. If I had to name the warning signs, they would be these:
- The post is plumb only because the braces are doing the work. That means the footing is still not holding.
- The top of the concrete is patched, but the base still rocks. That usually means the crack runs deeper than you can see.
- The soil around the post is soft or muddy after watering or rain. Drainage is still bad, so the repair will keep settling.
- The load is not centered on the post. Rails or panels are pulling from the wrong angle, which stresses the footing.
- The fence line sags after you remove the clamps. The post was never re-set to carry load.
A good repair feels different. The post stays plumb without the braces. The base does not wiggle when you push at waist height. Gates close without rubbing. Water drains away instead of collecting at the foot. That is the standard I would use.
When should you stop and replace the post instead?
You should stop and replace the post when the base fix would only hide deeper failure. That is the point where a repair becomes false economy.
The post is soft, split, or rusted near ground level: the post itself has failed — replace the post, not just the footing. A loose footing cannot restore strength to rotten wood or corroded steel.
The hole keeps collapsing or filling with water: drainage and soil bearing are failing — rebuild with a deeper, better-drained footing or relocate the post if the site is saturated. In clay or low spots, repeated re-setting often wastes time.
The post carries a gate and the hinge side is loose: gate loads twist the post every time the gate opens — use a new post and footing sized for hinge stress. A gate post needs more than a cosmetic fix.
More than one post in the line is moving: the fence run has a systemic problem — resetting one post usually does not solve the load pattern. Check line posts, end posts, and corners together.
The concrete pier is heaving or tilted by frost: seasonal ground movement is pushing the footing out of alignment — reset below local frost depth or change the footing design. In colder regions, shallow piers fail in cycles.
The fence was hit by a vehicle or fallen tree: impact damage often bends hidden hardware and splits rails — replace damaged members and inspect adjacent posts before reusing them. A force that moved one post hard enough to bend it may have weakened the next one too.
Common mistakes that cost people time and money
The most expensive mistake is treating every loose post the same. The fix for wet soil, cracked concrete, and broken hardware is not interchangeable.
-
Backfilling without correcting drainage. The post feels tight on day one, then loosens after the first heavy rain. The better move is to add gravel, redirect runoff, or reset the footing so water does not sit against the base.
-
Using too little material around the post. A few shovels of soil or a narrow patch of concrete do not create real lateral resistance. The correct alternative is a properly sized hole and material compacted in lifts.
-
Leaving the load attached while the repair sets. Rails and panels pull the post off plumb as the mix firms up. The fix is to detach or support the fence until the base can carry it.
-
Patching cracked concrete from the outside only. That hides the symptom but not the failure. The right answer is to inspect the footing and replace it if movement remains.
-
Re-using a damaged post because the top still looks fine. Ground-level decay or rust is where most of the strength is lost. The correct alternative is to replace the post if the section at grade is compromised.
-
Ignoring local soil behavior. Sandy soil drains fast but can wash out. Clay holds water and expands. Freeze-thaw moves shallow footings. The correct alternative is to match the repair to the site, not to a generic fence article.
How much does a repair usually cost, and what changes the price?
A basic loose-post repair can be cheap in materials and expensive in labor, or the other way around, depending on access and whether the post must be replaced. For a homeowner doing it themselves, the material bill may be limited to gravel, fast-setting concrete, and hardware. For a contractor, the price is driven by digging difficulty, post type, gate hardware, and whether the old footing must be removed.
The biggest cost factors are:
- Post material: wood is usually easier to reset than steel or vinyl assemblies with custom brackets.
- Depth and access: a post in tight landscaping or beside concrete paving takes longer to expose.
- Soil condition: sandy soil moves quickly but is easy to dig; clay and wet ground are slower and heavier.
- Footing failure: resetting a loose post is simpler than breaking out and replacing a cracked pier.
- Gate load: hinge-side posts often need more labor and stronger hardware than line posts.
Quick comparison: soil repair, concrete repair, or replacement
| Situation | Typical materials | Typical time | Best use | Rough cost range |
|---|---|---|---|---|
| Loose post in well-drained soil | Gravel, soil, optional fast-setting mix | 2 to 4 hours | Minor movement with sound post | Low material cost |
| Loose post in cracked concrete | Concrete patch, new bracket, or full reset | 1 to 6 hours | Loose anchor or damaged footing | Low to moderate |
| Full post replacement | New post, concrete, hardware, gravel | Half day or more | Rot, rust, heave, or repeated failure | Moderate to higher |
For how to fix loose fence post soil or concrete, the cheapest repair is not always the right one. If the footing is moving, a patch may cost less today and more next season.
External sources and local guidance
For manufacturer set and cure times, follow the product label for the exact mix you buy, and for safety around footings and frost depth, check local code guidance rather than guessing. For example, the International Code Council notes that footing requirements vary by climate and jurisdiction, while QUIKRETE provides product-specific set-time guidance for its fast-setting mixes. The USDA Natural Resources Conservation Service also explains how drainage and soil behavior affect stability in wet ground.
Related guides
If the post still shifts after you try to re-set it, inspect the rail connections and gate hardware next. A fence that keeps loosening may need a new post, better drainage, or a redesigned footing.