Last updated: September 10, 2026
Key Takeaways
- Walk the line again after 10 to 15 minutes.
- Grip the wire with a stretcher or pulling tool about 12 to 18 inches from the splice or end.
- The tightened wire should sit parallel to the rest of the fence, usually 6 to 12 inches apart depending on your layout.
- The practical fix is closer post spacing, sometimes 8 feet rather than a wider run, though your actual spacing depends on livestock pressure and terrain.
A sagging strand is not a mystery. It usually means the line lost tension after weather, a broken tie, a gate bump, or a repair splice. So the job is simple in theory and a little fussy in practice: tighten it slowly, keep the anchor solid, and stop before the fence gets drum-tight and brittle. This guide on how to tighten barbed wire fence by hand or with a stretcher covers the basic tools, safe tensioning, and the signs that mean the problem is structural, not just slack wire. I’m talking about a fence line that has lost its pull after weather, a broken tie, a gate bump, or a repair splice. This article is for a landowner, ranch hand, or fence repairer who already has a post-driven barbed wire fence in place and wants it tight enough to work again without snapping wire, bending posts, or building a drumhead that will fail at the next cold snap.
Who this is for — and who should do something else

This method fits a standard barbed wire fence with line posts and corner/end posts that are still sound. I’m assuming you already know the difference between a line post and a brace assembly, and that you have ordinary hand tools: fencing pliers, gloves, wire cutters, hammer, and a way to anchor or hold tension. Little job. Big consequences. If the fence has only sagged a little, hand tightening or a manual stretcher is usually enough. If the wire is rusted, kinked, or patched in several places, the problem is not tension alone.
I would not start here if the fence is missing a brace, the end post leans, the staples have pulled badly from wood, or the line is so loose that multiple wires hang 6 inches or more below where they belong. In those cases, tightening a damaged structure just transfers the load to the weakest part. A good result depends on the post system holding the pull. On a barbed wire fence, the standard working unit is the brace end: one solid corner or end post, a brace post, a brace wire, and a stretcher bar or puller if you use one.
A useful benchmark is plain enough: the wire should look straight between posts, carry some spring, and not bow hard enough to touch the lower wire under normal wind. It does not need violin-string tension. Over-tightening is one of the most common reasons a fence fails a week later.
What do I need before I start?
You need enough hardware to make the pull and enough room to work the wire without creating a new kink. At minimum, I would have fencing pliers, leather gloves, eye protection, a hammer, a wire stretcher or fence tensioner, and a couple of short tie wires or fence clips. If you are using a stretcher, a pulling tool with grabbing jaws or a stretcher bar works better than trying to drag barbed wire with bare hands or ordinary pliers.
For a hand-tightening job, the main requirement is an anchor point. That usually means a solid brace end or a temporary anchor such as a vehicle, come-along, or stout deadman setup. A deadman is a buried anchor log or post used to resist pull. No anchor, no safe tension. That’s the whole ballgame.
You also need to know whether the wire is 12.5-gauge or 14-gauge. That matters because heavier wire tolerates more pull than lighter wire. Barbed wire is commonly sold by gauge, and the exact brand is less important here than the condition of the metal. If the wire is heavily rusted, it will not forgive much tension. A rusty splice is a weak point.
Before touching the line, inspect a 20- to 30-foot section around the sag. Look for bent staples, cracked insulators if this fence is mixed with electric components, and posts that are tilted more than a few degrees. If the corner post moves when you push it by hand, stop and fix the brace first. Tension cannot compensate for a loose foundation.
How do I tighten barbed wire fence by hand?
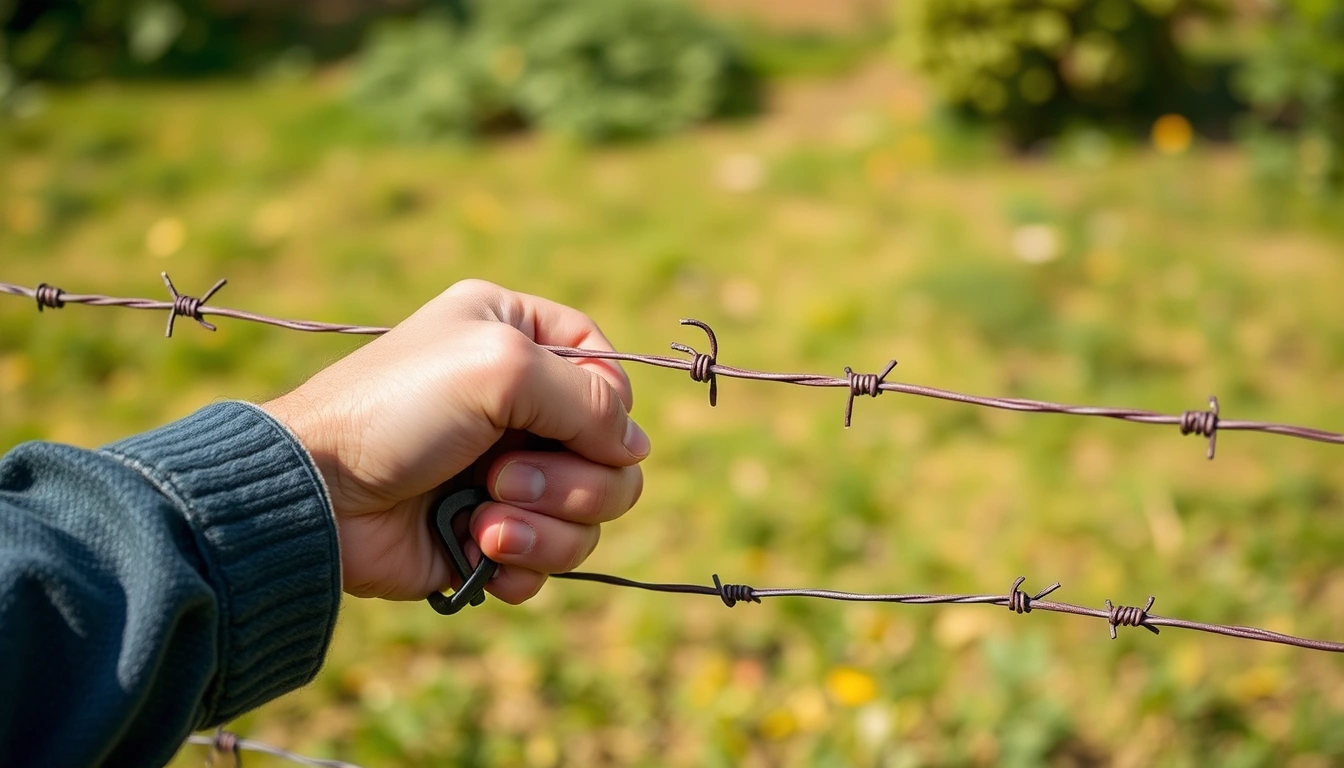
Tightening barbed wire by hand means taking the slack out in steps, anchoring the line, and resetting it without twisting the steel. Start at a sound brace end or a temporary anchor, then pull one wire at a time rather than trying to tension an entire fence line at once. The goal is a straight line with enough give to absorb temperature change and a cow rubbing on it, not a cable guitar.
- Release the wire from one or two line staples near the sag. Pull the staples just enough to let the wire slide, usually 1 to 3 posts’ worth of freedom. Verify the wire can move without scraping hard against wood. If it jams, you risk kinking or tearing the barb points loose.
- Choose your anchor and direction of pull. Set the pull toward the nearest solid corner or brace, not toward a weak post. Verify the end post does not flex under hand pressure. If the post moves visibly, the anchor is not strong enough.
- Grip the wire with a stretcher or pulling tool about 12 to 18 inches from the splice or end. If you are pulling by hand, use fencing pliers and gloves only for short adjustments, not for full tensioning. Verify the grip is square on the wire and not biting into a barb. If the tool slips, stop and reset; slipping makes a burr or kink that later breaks. If you are unsure about the setup, consult a fencing professional and follow the tool maker’s instructions, because manual wire tensioning can fail if the anchor or grip point is wrong. [USDA NRCS](https://www.nrcs.usda.gov/)
- Apply tension in small increments, not one hard yank. Pull until the wire straightens and loses the visible belly, then stop. I’d rather leave a little give than chase perfection and wreck the line. Verify nearby posts are not bending and the brace wire stays tight. If the brace starts to rack or the post leans, you have crossed into structural overload.
- Check alignment against the other wires and the ground. The tightened wire should sit parallel to the rest of the fence, usually 6 to 12 inches apart depending on your layout. Verify the barbs do not sit hard against the next wire or the post. If the wire bows upward or downward sharply between posts, the pull is uneven.
- Fasten the wire at the new tension. Re-staple loosely on wood posts so the wire can still move slightly, or tie off with proper fence clips. Verify the staple is not driven so tight that it pinches the wire solid. A pinched wire holds stress in one spot and is more likely to snap later.
- Cut and tuck any excess after the splice or tie-off is secure. Leave enough tail for a proper wrap, typically several inches, then bend the sharp end away from livestock and hands. Verify no cut end projects into the travel side of the fence. If you are not sure the splice or tie-off is safe, consult a fencing professional before trimming the tail; the National Ag Safety Database and extension guidance both stress careful handling of sharp wire ends. [National Ag Safety Database](https://nasdonline.org/)
- Walk the line again after 10 to 15 minutes. Tension settles quickly once the wire stops moving through the staples. Verify the fence still looks straight after the first load. If it has already sagged again, the problem is usually a weak anchor, not the wire itself.
A hand-tightened fence is done when the slack is gone, the wire no longer bangs in the wind, and the posts stay upright. If you can over-pull the wire until it rings hard, that is not a better fence. It is a fence under strain.
How do I tighten barbed wire fence with a stretcher?
A stretcher gives you controlled pull and is the cleaner choice when the span is long, the wire is stubborn, or you need to reconnect a cut section. A fence stretcher, sometimes called a tensioner or stretcher bar setup, holds the wire evenly so the pull spreads across several barbs instead of one stressed spot. That matters on old fence, where a single weak barb can fail suddenly.
Set the stretcher on the wire between the anchor point and the sag, usually a few feet from the splice or end. Make sure the jaws engage the plain wire, not the barb knot, if the tool design allows that. Pull until the line straightens, then stop and inspect. If the fence uses multiple strands, I would tighten each strand separately, starting with the top wire only if that is the one carrying the load, then working down.
A stretcher helps most when the line is long enough that hand pulling creates uneven tension. It is also the better option if you need to rejoin wire with a proper splice. A good splice keeps the tension path continuous; a bad one creates a lump that catches on staples and wears out faster. If you are using a splice, both wire ends should overlap enough to wrap securely, and the finished connection should not snag a glove when you slide your hand past it. If you are not confident about the splice, consult a fence installer or extension specialist before you tighten it further. University of Nebraska-Lincoln Extension
The drawback is that a stretcher can tempt you to overdo the pull because the tool makes it easy. I would watch the corner post, not the tool handle. When the post starts to tell you the truth, stop. Stronger pull, sure. Better fence? Not always.
What should I check before I tighten it any farther?
I would check the brace, the wire condition, and the post spacing before adding more tension. Those three things decide whether more pull will help or harm. A barbed wire fence that is already failing structurally will not improve just because the wire looks straighter for a day.
Start with the corner or end brace. A brace assembly should resist the line load without racking. If the diagonal brace wire is loose, the line post is leaning, or the brace post is moving in the ground, stop. The fence needs structure first. Next, inspect the wire itself for rust pitting, birdcaging, or sharp bends from previous breaks. Birdcaging is the permanent twisting and widening of wire after a bad pull. Once wire has birdcaged, it will never tension evenly again.
Post spacing matters too. A long span, especially on uneven ground, usually shows more belly than a shorter one, so the wire may need extra support or a closer post layout. If your posts are widely spaced, tightening may reduce sag but not eliminate it. That is normal. On rough ground, the fence should follow the contour enough to stay functional, not force one straight horizontal line across a dip.
A final check is weather. Metal contracts in cold weather and expands in heat. If you tighten a fence hard on a cool morning, it may be too tight by afternoon. I prefer a moderate setting rather than a brittle one. If the line already feels stiff enough to vibrate sharply when plucked, stop there. Otherwise you’re just inviting the fence to throw a tantrum later.
When should I stop tightening and fix something else?
Stop tightening when the fence itself is telling you the structure is wrong. Here are the clearest situations:
End or corner post moves when you pull: the anchor is failing — rebuild the brace before tightening the line.
Wire is rusted through, deeply pitted, or birdcaged: the metal is already damaged — cut out and replace the bad section instead of forcing it tighter.
Staples are tearing out of wood posts: the posts are not holding the load — reset staples lower and looser, or replace the posts if the wood is split.
Multiple wires sag on the same span: the problem is likely the whole fence line, not one strand — check brace integrity and post lean before tensioning each wire.
The fence crosses a gate opening or a terrain dip where animals push hard: the load point is concentrated — use a stronger brace, a closer post spacing, or a different layout rather than extra pull.
The wire has a sharp kink from a previous break: that kink is a weak point — cut it out and splice in fresh wire if you want the line to last.
If you keep pulling past these signs, you buy a temporary fix at the cost of a later break. That is especially true on older 12.5-gauge fence that has already lived through a lot of weather. I would replace damaged wire before I would chase tension on a failing line.
The mistakes people actually make
The first mistake is over-tightening the wire until the brace starts to complain. The consequence is a snapped wire, a pulled staple, or a leaning post. The better alternative is to tension in stages and stop as soon as the belly disappears.
The second mistake is tightening one strand and ignoring the rest of the fence. That leaves uneven load, and the slack wires still invite animals to push through. I would inspect every strand in the repaired span and bring them back to a similar working tension.
The third mistake is pulling from a weak point, such as a line post or loose corner. That only drags the failure farther down the fence. Anchor to the nearest solid brace, or rebuild the brace before you pull.
The fourth mistake is clamping the wire too close to a barb or staple point. That concentrates stress and can cut into the wire coating or metal. Use a proper grip point on the plain wire and keep the pull smooth.
The fifth mistake is leaving sharp cut ends and loose tie wire tails. Those ends can catch clothing, hides, and skin. Tuck every tail away or clip and fold it back.
The sixth mistake is calling a bent fence “tight enough” because it no longer sags. A fence can be tight and still be wrong if it is pulling the post out of plumb. Straight line, sound brace, and moderate tension all have to show up together.
What changes on long runs, hills, and old fence?
Long runs need a lighter hand and, sometimes, intermediate tightening points. On a long straight section, tension does not distribute evenly if the wire is old or the posts are far apart. Instead of yanking from one end, I would tighten in stages and check each post line as I go. That avoids building a tight spot near the anchor and a loose pocket halfway down the line.
Hills are different because the wire wants to cut downhill and lift off the top of a rise. On a steep change, you may need to accept a little more visible sag than you would on level ground. If you pull it dead straight across a ridge, the wire can become too tight at the low point. The practical fix is closer post spacing, sometimes 8 feet rather than a wider run, though your actual spacing depends on livestock pressure and terrain.
Old fence has the biggest trade-off. Rusted 14-gauge wire and old staples will not hold the same tension as fresh material. If the fence has several patched sections, I would expect each repair to be conservative. Tightening old wire until it looks new is how you make it fail sooner. On aged lines, it is often better to work with the wire’s limits than to force a newer-looking result.
A simple repair sequence
Before you start, gather the tools, check the brace, and decide whether you are working by hand or with a stretcher. If the end post or corner post moves, stop and fix that first. A solid anchor saves time later.
Next, free the wire enough to slide, then pull in small steps. Keep the grip on the plain wire, not on a barb knot. Watch the posts as much as the wire. If the line starts to rack, stop.
After that, secure the wire at the new tension and trim only what you can safely tuck. The finished line should look straight, sit in the same plane as the other wires, and hold without hard strain. Then check it again after 10 to 15 minutes. That second look often shows whether the repair is lasting or whether the brace needs more work.
If the fence still sags after a careful tightening, the wire may be at the end of its life. At that point, the best fix is replacement, not another pull.